Identification
How to Make and Read a Mushroom Spore Print
Make a controlled mushroom spore print, record the result clearly, and understand why a print supports—but never proves—an identification.
By MushroomScope Editorial Team · · Updated
Safety first
Use as a field-record guide
Document the whole mushroom, habitat, substrate, and region before comparing names or photographs.
Open the identification safety hub →Decision limit
Do not use this as an edibility verdict
Wild mushroom consumption decisions require qualified local, in-person confirmation of the complete specimen.
Read the safety disclaimer →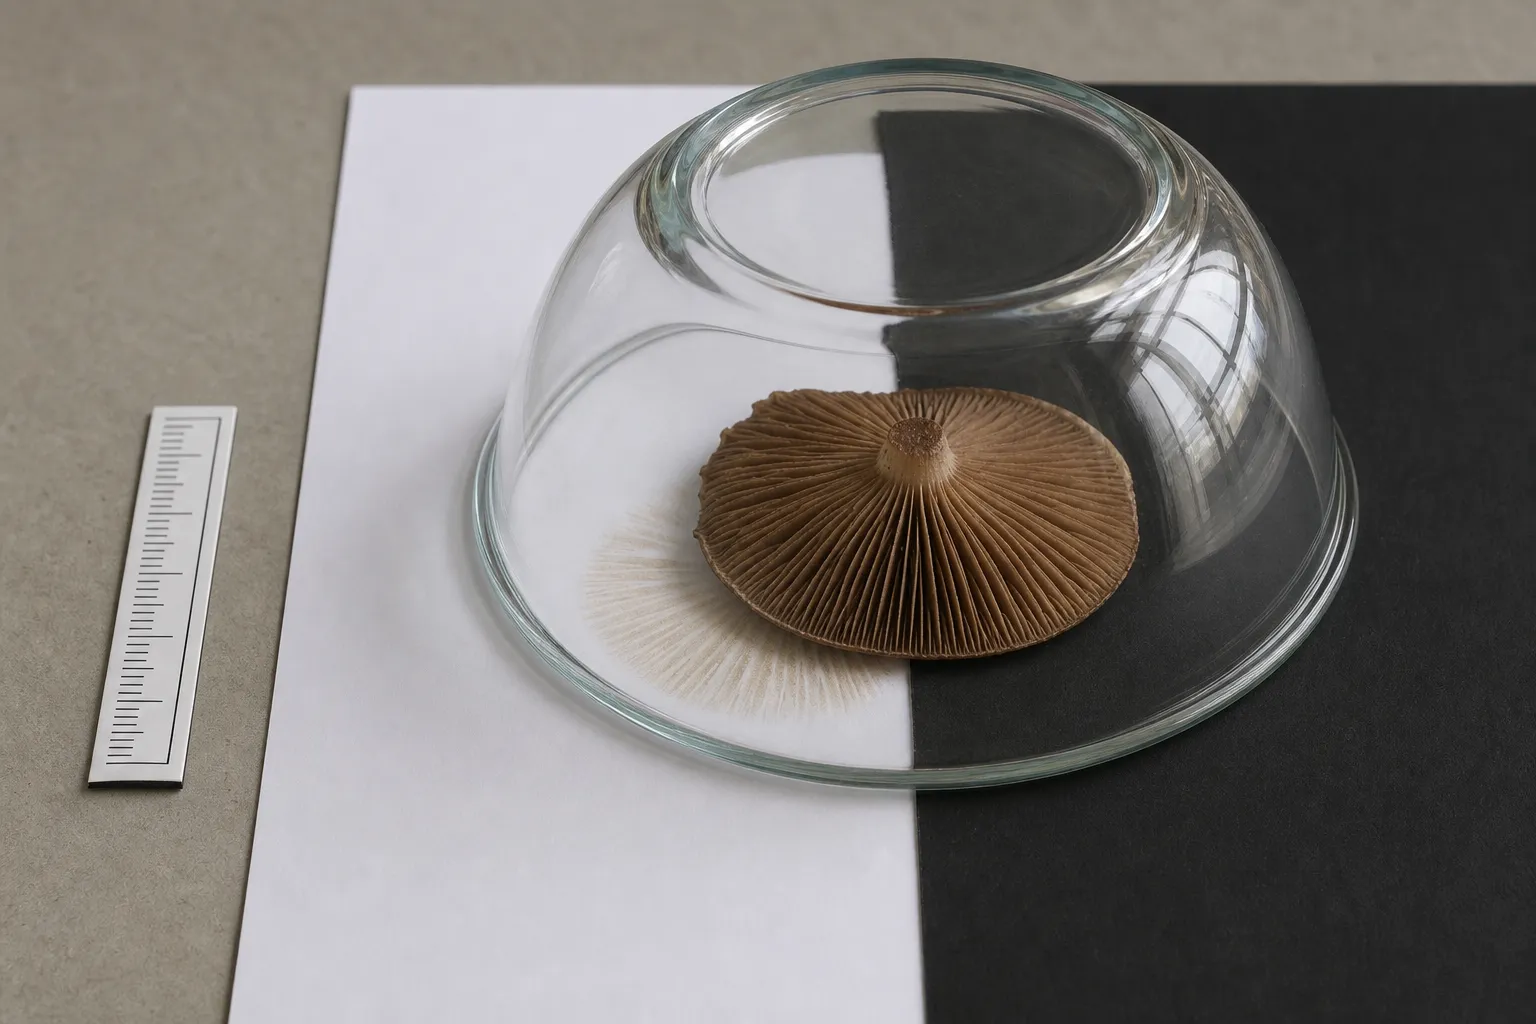
Use a spore print as one recorded character
A spore print is a visible deposit left when a mushroom releases many spores onto a still surface. It can help narrow an identification by recording a broad deposit color, but it is not a species name and it is never an edibility test. Make the print only after you have photographed and recorded the intact specimen, because removing the stem and leaving a cap overnight can erase or change useful characters.
The most useful home setup places the mature cap’s fertile surface down across adjoining white and black paper or card, then covers it with a bowl or jar to reduce air movement. Leave it undisturbed overnight, then record what you actually see. Iowa State University Extension describes this paired-background method and recommends recording the deposit color the following day.
Before you set up the print
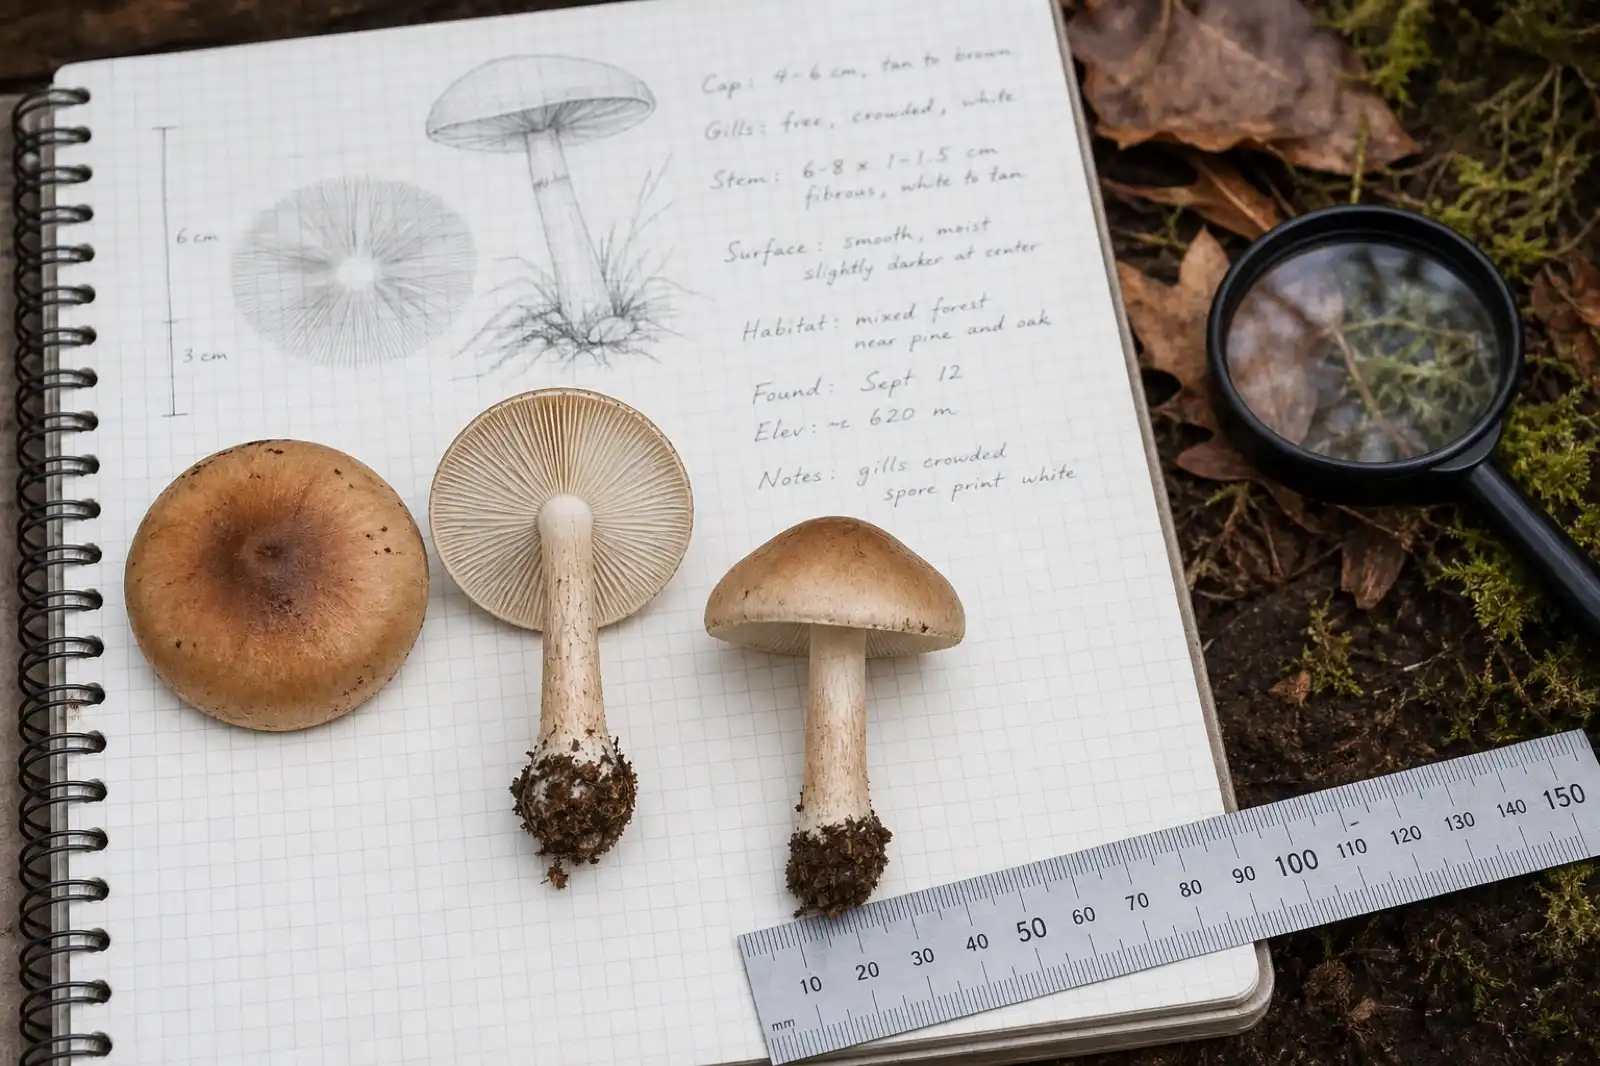
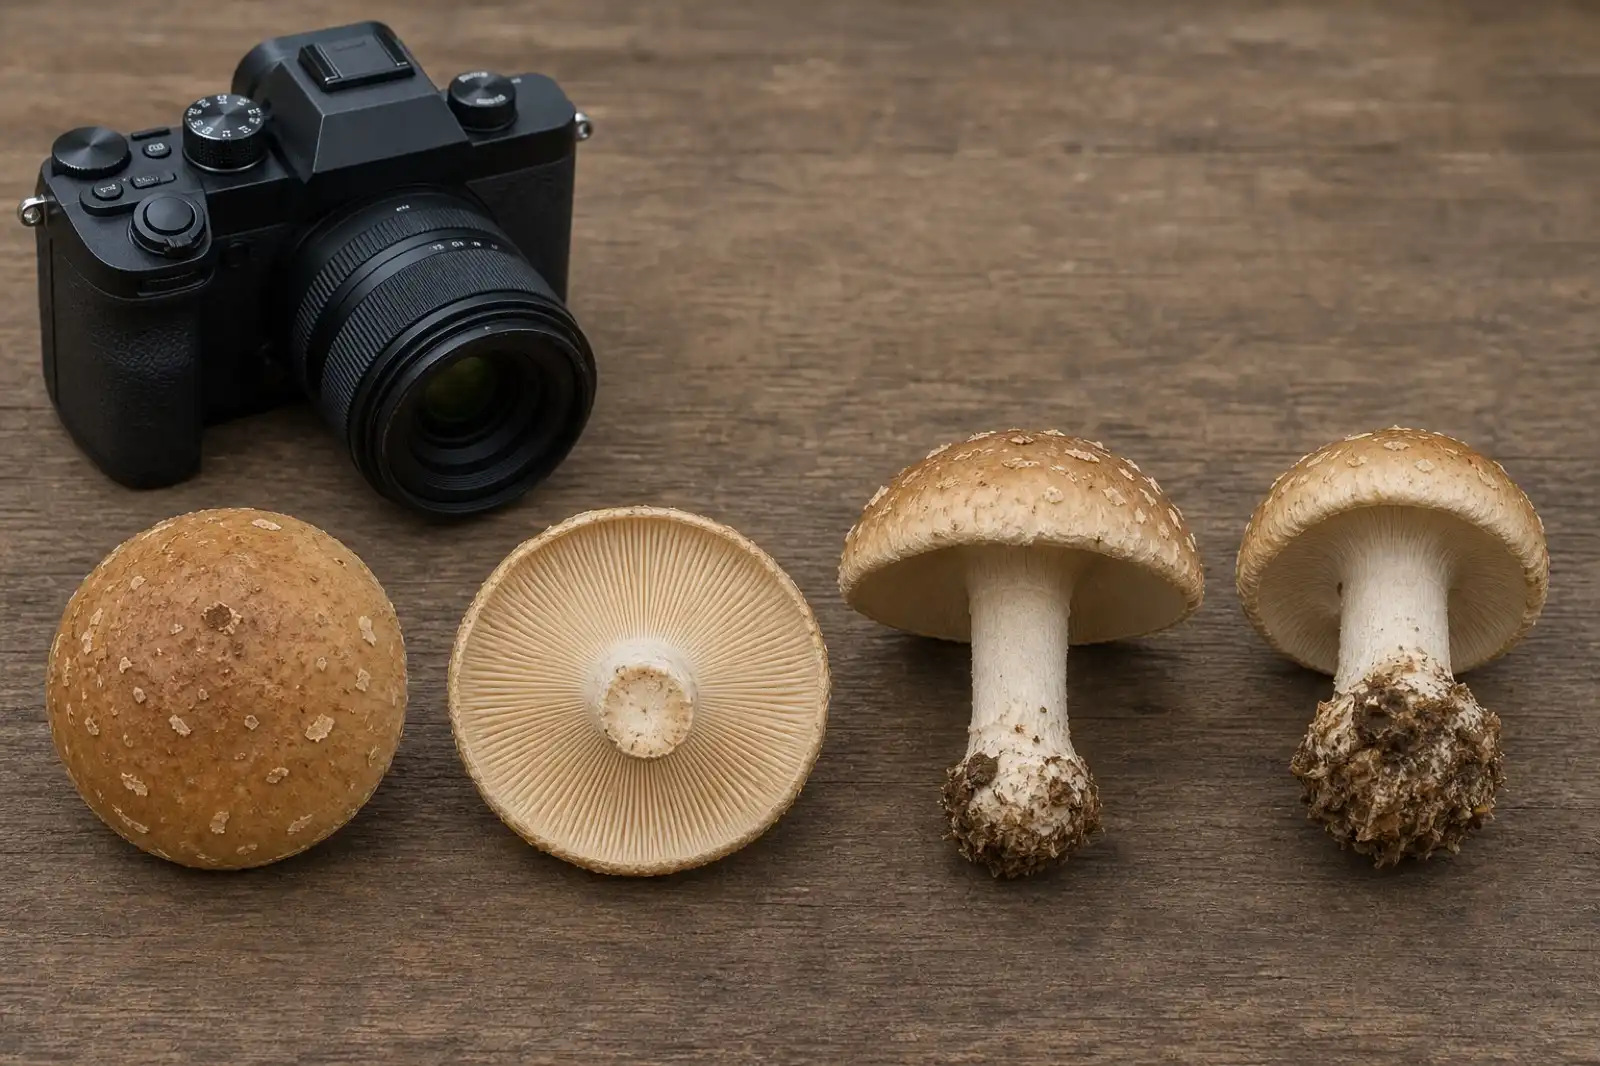
Treat a print as one part of a record, not the first or only test. Photograph the mushroom where it grew before disturbing it. Include a size reference, the cap from above and below, the complete stem, and the stem base. Also note the date, region, substrate, nearby trees or plants, and whether the mushrooms were single, clustered, or growing in shelves. Iowa State Extension advises keeping the base intact because some groups require characters there for identification.
If collection is legal, carry each collection separately in paper or wax paper and keep the notes associated with it. Avoid plastic bags, which can speed deterioration and blur the features you intended to document. Do not taste an unidentified mushroom or rely on an app, a photo match, or a print alone to decide whether it is safe.
Assemble a clean, labeled observation setup
- A mature, reasonably fresh cap or a piece of a larger cap. Immature or deteriorated specimens may not release a useful deposit.
- One light and one dark, clean, dry, nonabsorbent-looking surface placed edge to edge. Plain white paper and black paper or card are a practical pair.
- A clean bowl, jar, or cup large enough to cover the cap without touching the fertile surface.
- A camera or phone, a ruler, and a notebook or specimen label.
Keep the setup away from food-preparation surfaces and out of reach of children and pets. Wash hands after handling a wild mushroom and clean the work surface afterward. These are sensible handling precautions, not proof that a specimen is harmless.
Label the light and dark surfaces before placing the cap. Include a specimen number, collection date, and general locality without writing where the deposit is expected to fall. If several caps are being printed, use separate covers and clearly separated surfaces. Do not let caps, stems, notes, or deposits from different collections touch; a mixed record can create a convincing but false combination of characters.
Choose a location with stable room conditions and little traffic. A refrigerator, food cabinet, dining table in active use, or bathroom with changing moisture is not an appropriate observation area. Do not aim a fan at the setup or deliberately inhale released spores. People with known respiratory sensitivities should avoid unnecessary exposure and ask an appropriate professional about safe handling.
A controlled step-by-step method
- Document first. Photograph the intact mushroom in habitat and then photograph the cap, underside, stem, complete base, and any bruising or veil features. Put the specimen number in your notes.
- Choose a cap that can release spores. A mature cap with an exposed fertile surface is more likely to work than a very young, wet, dried out, or badly damaged one. A failed print is an observation, not a reason to force an identification.
- Prepare contrasting backgrounds. Put a white and a black surface directly beside each other. The split background makes a light or dark deposit easier to see than either color alone.
- Place the fertile surface down. After recording the stem and base, remove the stem if needed so the cap sits level. Set the gill, pore, tooth, fold, or other spore-bearing surface down across the two backgrounds. Large caps can be printed as a section.
- Cover without sealing. Place a bowl, jar, or cup over the cap. The cover reduces drafts that can carry spores away; it does not need to turn the setup into a sterile culture project.
- Leave it undisturbed overnight. Avoid moving the table or lifting the cover to check progress. UF/IFAS Extension similarly recommends covering the cap and allowing it to sit for about a day.
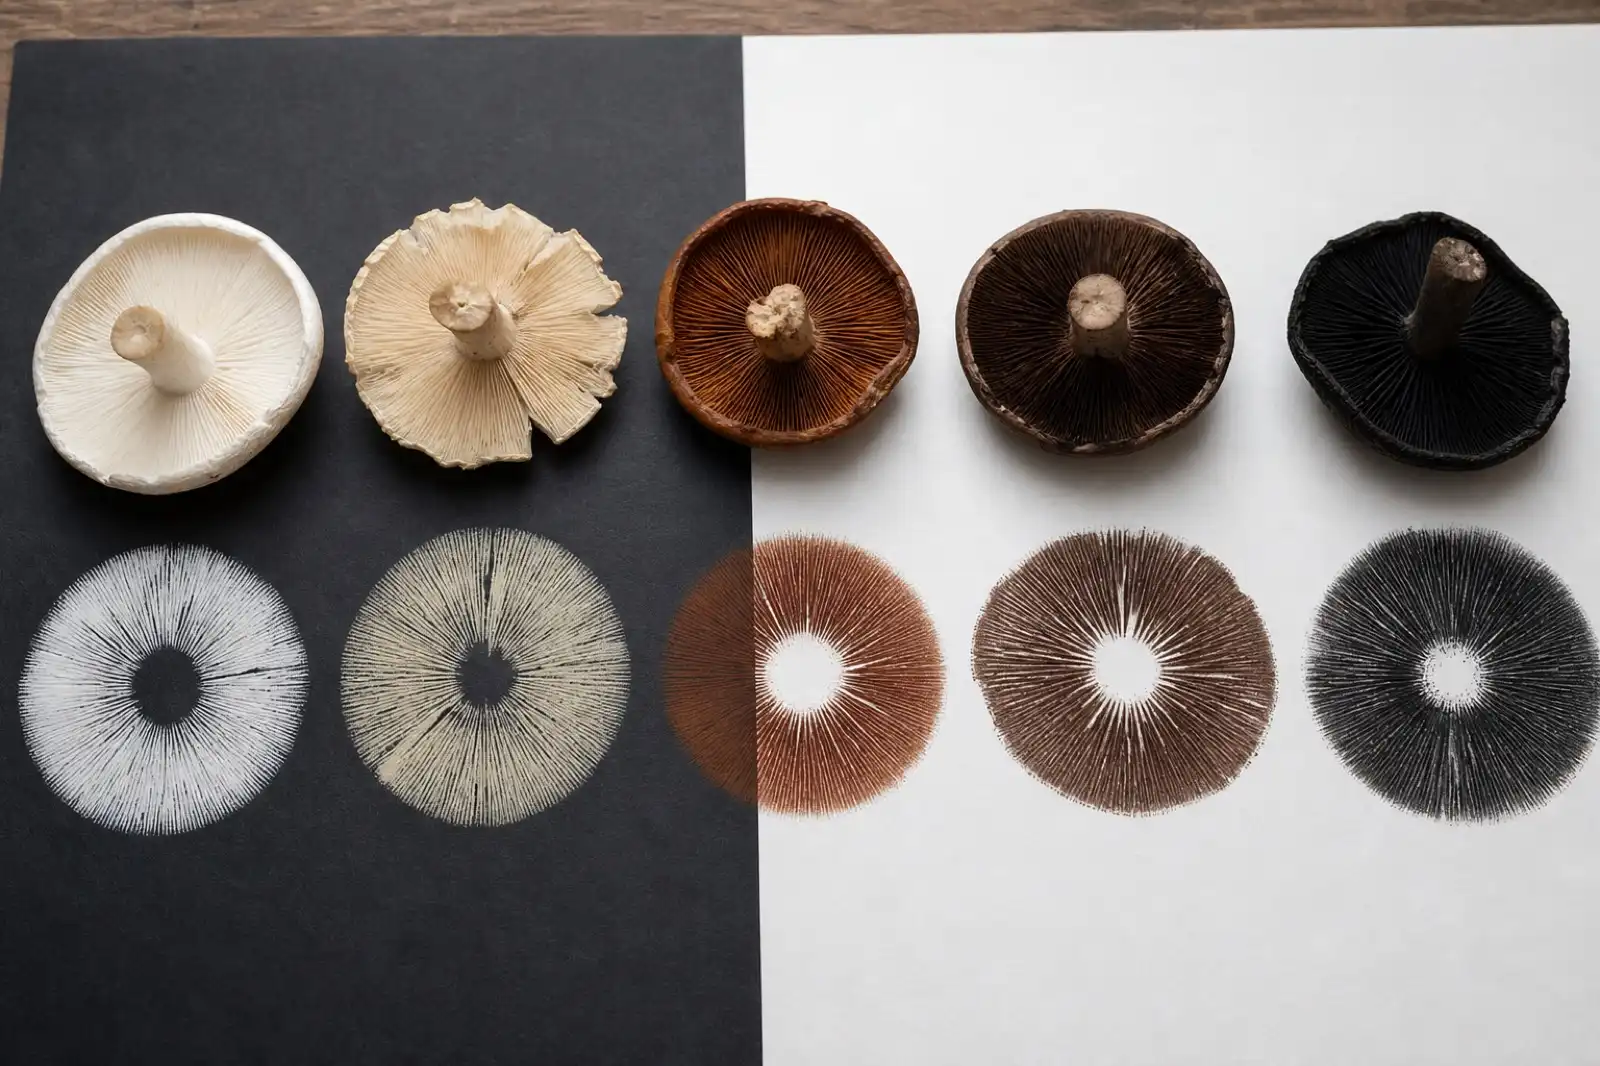
- Record the deposit, not a guess. Lift the cover and cap carefully. In neutral light, write a plain-language color such as white, cream, pink, rusty brown, purple-brown, or black, and photograph the print on both backgrounds. Note whether it is faint, dense, patchy, or absent.
If little appears, first preserve the result in your notes. The cap may have been immature, past its spore-producing stage, too dry, or simply unsuitable for this method. A pale print might also be easier to see on the dark half of the surface. Repeat only with another well-documented specimen, not by overwriting the original observation.
Distinguish a spore deposit from moisture and debris
A cap can leave condensation, colored moisture, soil, tissue fragments, or pigment on the surface. Inspect the result before assigning a spore color. A true mass deposit often follows the arrangement of the fertile surface, but a visible pattern alone does not prove that every mark is made of spores. Photograph the cap position before lifting it and the undisturbed surface immediately afterward.
Use neutral, diffuse light and compare both background halves. Avoid colored room lighting, aggressive phone filters, automatic “vivid” enhancement, or editing that changes hue. If the deposit is too faint to describe beyond “light” or “dark,” record that limitation. A precise-sounding label such as salmon, cinnamon, or chocolate is not more scientific when the evidence is weak.
Do not add water, household chemicals, food coloring, or other reagents to make a faint result visible. Chemical tests used in specialist keys require defined reagents, controls, and interpretation; an improvised treatment can destroy the record and create a handling hazard. Keep the untreated observation as the primary evidence.
How to read the result conservatively
The print records a mass deposit color; it does not reveal individual spore shape, size, wall features, or ornamentation. Those microscopic traits require suitable equipment and the methods used by a relevant key. Even at the visible level, many unrelated mushrooms can share a broad print color.
Use the result to test a hypothesis against a regional key, not to create one from a photo. Ask whether the prospective group also matches the fertile surface, attachment, stem base, cap texture, habitat, substrate, season, and geographic range. If one decisive feature conflicts, keep the identification unresolved. Iowa State Extension specifically advises using keys rather than comparing a specimen only with photos online.
For a color vocabulary and a fuller list of companion observations, see the spore-print color guide and the mushroom identification checklist.
Save the result without losing its context
First save photographs of the fresh deposit on both backgrounds with the specimen label and a neutral color reference if available. Keep the original image files because screenshots and social-media uploads may alter color or remove metadata. Write the observed color in the field notes rather than relying on the photograph alone; cameras, screens, and white-balance processing can all shift appearance.
If retaining the physical paper is useful, let it remain undisturbed in a protected, dry area and follow the receiving herbarium’s or identifier’s instructions. Do not spray it with craft fixative, hair spray, or adhesive unless a qualified recipient specifically requests a defined method. A coating can change color, obscure microscopic material, introduce chemicals, and prevent later examination.
Link the print to habitat photographs, the intact specimen images, the removed stem and base record, and any preserved material. State whether the deposit was dense, faint, patchy, contaminated, or absent and how long the cap rested. A “failed” print with an intact evidence trail is more useful than a dramatic deposit whose specimen identity was lost.
Common mistakes that weaken a print
- Printing before taking photographs: this can sacrifice the intact stem, base, and underside views that another identifier needs.
- Using one background only: a pale or dark deposit may be nearly invisible against the wrong color.
- Calling a faint smear a precise color: record uncertainty and lighting conditions instead of selecting a color category by force.
- Treating a cap-shaped deposit as an identification: the radial pattern shows that spores fell from a cap; it does not distinguish all possible species.
- Discarding habitat information: whether a mushroom grew from soil, leaf litter, living wood, or dead wood can matter as much as the print.
The mushroom photo checklist can help preserve those details before you make any destructive observation.
Safety limits and what to do after an exposure
No online article, photo set, spore print, or color result can verify that a wild mushroom is edible. The CDC states that wild mushrooms should not be consumed unless identified by an expert, and Oregon Health Authority likewise warns that cooking does not make a toxic mushroom safe. Keep specimens and leftovers away from food until their status is clear.
If someone may have eaten a wild mushroom, seek urgent local medical or poison-control advice rather than waiting for a print or an online identification. If it is safe to do so, retain uncooked material, cooked leftovers, packaging, and photographs for professionals. Do not induce vomiting unless a clinician or poison center specifically directs it.
Use the print with the complete collection
A pale print can support a Flammulina comparison only when it remains tied to the same intact cluster, stem bases, gills, and host wood. The velvet shank guide shows why pale spores are supporting evidence while rusty-brown spores, a ring zone, or mixed clusters require a stop and wider comparison.
References
Source quality notes
MushroomScope cites sources that match the page scope, such as taxonomic databases, extension guidance, food-safety agencies, food-composition databases, and peer-reviewed or institutional health references. Sources support context and uncertainty; they do not turn an online page into specimen identification, medical advice, or a tested recipe record.
Frequently asked questions
How long should I leave a mushroom cap for a spore print?
An overnight rest is a practical starting point. A mature, fresh cap may leave a deposit sooner, while an immature, old, dry, or damaged specimen may leave little or no visible print.
Why use both black and white paper for a mushroom spore print?
A pale deposit can disappear against white paper and a dark deposit can disappear against black paper. Adjacent contrasting surfaces make the observation easier to document without changing the specimen.
Can a spore print tell me whether a wild mushroom is edible?
No. Spore-print color is one observation among many and cannot establish edibility or safety. Do not eat a wild mushroom unless an experienced local expert has identified the complete specimen.
Related guides
identification
Mushroom Spore Print Colors and How to Record Them
Use a controlled spore deposit to distinguish broad color groups while recognizing that print color alone never identifies a species.
identification
How to Identify Mushrooms: A Beginner's Field Guide
Build an identification from the whole specimen, substrate, habitat, spore deposit, and location—not from a single photograph.
identification
Mushroom Photography Checklist for Identification
Capture the cap, underside, complete stem base, habitat, scale, and specimens at different ages before asking for identification help.
Continue exploring
Browse more practical guides in Identification or visit the mushroom encyclopedia.