Growing
Mushroom Tissue Cloning: From Inner Tissue to a Clean Culture
Clone cultivated mushroom tissue to agar with realistic sterility limits, donor selection, transfer tracking, contamination triage, and identity safeguards.
Growing method
Start with authenticated culture
Use supplier-identified spawn or blocks and record substrate, stage, temperature, humidity, and visible changes.
Open the beginner growing hub →Food safety
Discard suspect batches
Unusual colors, slime, insects, or abnormal odor should be treated as a safety concern, not a climate tweak.
Review contamination guidance →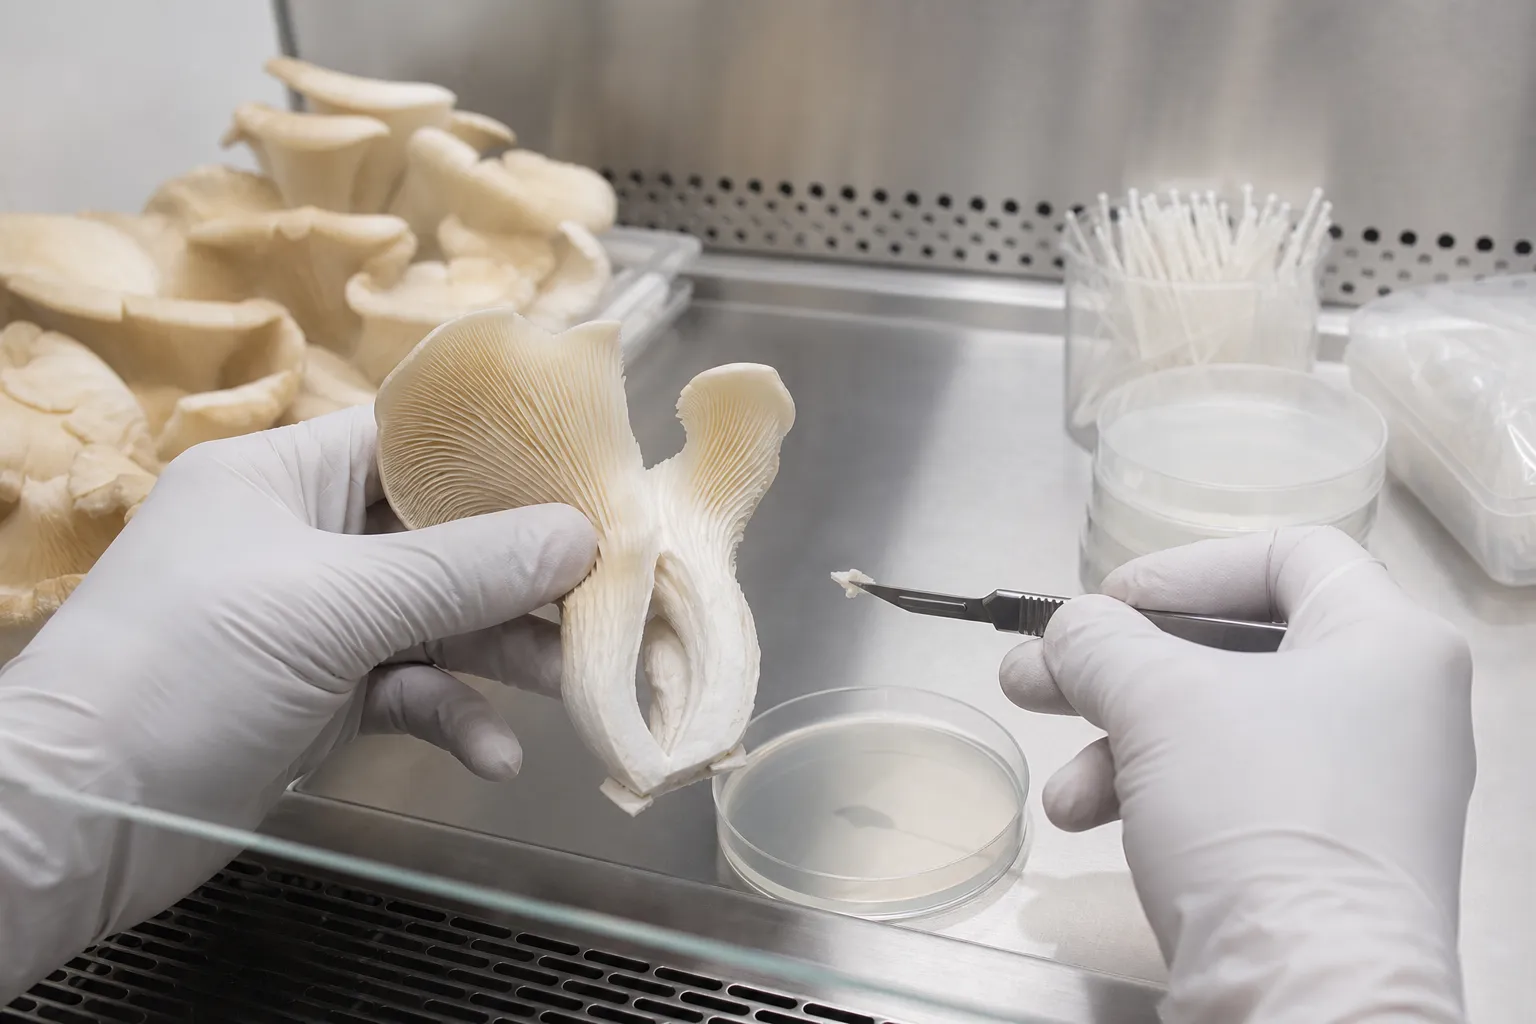
Cloning copies tissue, not certainty
Tissue cloning starts a culture from a fruit body rather than spores. It can preserve much of the donor genotype, but it does not prove species identity, eliminate latent contamination, or guarantee the same yield under another substrate and climate. Clone only lawful, documented cultivated material for an appropriate project. An impressive wild mushroom is not automatically a safe or useful culture source.
What a clone can and cannot inherit
A tissue isolate begins from cells of one fruit body, but a mushroom can contain genetically different sectors, microorganisms, and accumulated changes. Culture appearance does not prove species, genetic stability, or absence of bacteria. Preserve the supplier label and donor photographs, assign a unique clone ID, and describe the material as a candidate clone until clean growth and a production trial support further use.
Choose a documented cultivated donor
Record supplier, strain or lot, species label, harvest date, substrate, flush, fruit-body position, maturity, form, and performance. Choose healthy tissue without insect tunnels, soft decay, or abnormal growth. Retain photographs and the donor label. If the scientific identity matters, use authenticated source material or independent confirmation rather than relying on the clone procedure itself.
Sample timing matters
Fresh, firm tissue is easier to handle than a waterlogged, insect-damaged, refrigerated-for-days specimen. Record the interval from harvest to transfer and storage temperature. Select a donor for a stated reason—cluster form, harvest timing, quality, or yield record—rather than size alone. A large fruit body at the edge of an overmature flush may be a poor representative of the production trait being selected.
Prepare agar and workspace before opening tissue
Prepare poured, sterile agar plates, sterile tools, labels, waste container, and the clean-air workspace before handling the mushroom. High-nutrient agar readily supports competitors. A still-air box reduces moving-air deposition but does not sterilize dirty material; filtered-flow equipment only works with correct setup and technique. Keep alcohol away from flame and let treated surfaces dry.
Arrange a one-way transfer path
Place unopened plates, sterile tools, labels, and waste so clean hands do not cross used material. Label plate base—not lid—with clone ID, medium, date, tissue location, and plate number before starting. Run an unopened-media control from the same batch and, when appropriate, an exposure control that reflects the workspace. These controls cannot prove the sample clean, but they help separate media or environmental failure from donor-associated contamination.
Expose clean inner tissue by tearing
Tear the fruit body open to expose tissue that has not touched the exterior. The stem-cap junction or another firm internal region is often convenient for cultivated fleshy mushrooms. Do not drag a blade from the outside inward. The donor exterior remains microbially exposed even when it looks clean, and washing it does not convert it into sterile tissue.
Tearing protects the sampling face
Cutting from the outer surface toward the center can carry surface organisms along the blade. Split the fruit body with clean hands or sterile technique appropriate to the workspace, then use a cooled sterile tool on firm tissue that has not touched gloves, bench, exterior, or blade path. Avoid gills and exposed pores because they carry spores and environmental material. A rice-grain-sized or smaller fragment is enough; a larger piece imports more donor surface without guaranteeing faster recovery.
Transfer a tiny piece without crossing dirty surfaces
Use a sterile cooled tool to lift a very small internal fragment and place it on agar without contacting gloves, container walls, plate rim, or the donor surface. Open the plate only as much and as long as needed. Seal by the laboratory’s validated method and label the plate immediately with culture code, transfer type, medium, date, and operator.
Minimize plate-open time
Lift the lid only enough to place the fragment near the agar center, without touching the rim or dragging tissue across the surface. Seal according to the plate system and incubate in a position that limits condensation falling onto the culture. Do not stack plates so densely that temperature differs across the stack without being recorded. Photograph through the closed plate at consistent intervals.
Incubate sealed plates and observe sectors
Incubate under the species and laboratory protocol, away from food and living spaces where possible. Observe through the sealed plate. Photograph growth at fixed intervals and note bacterial sheen, colored sporulation, satellites, irregular margins, or unexpected odors without opening. Mycelium appearance alone cannot verify purity or species.
Read distance, texture, and timing together
Record first visible recovery and the distance from tissue to colony margin on a fixed schedule. Bacterial films may be glossy, translucent, or confined near the tissue; molds may change texture or produce colored spores. Mushroom mycelium itself can be cottony, rope-like, thin, or uneven depending on medium and conditions, so morphology alone is not a purity test. Keep suspect plates sealed and away from clean work.
Clean-up transfers have limits
A leading-edge transfer may separate clean growth from a localized competitor, but repeated transfers can spread an unseen contaminant and consume time. Do not open heavily sporulating plates in the clean workspace. Establish discard criteria and move suspect cultures out sealed. A clean-looking plate is a candidate for further testing, not proof that downstream grain is safe.
Transfer from an interpretable leading edge
When a clean-looking margin is well separated from a visible competitor, take a small piece from that margin to a new labeled plate. Do not cut through the contaminant or assume repeated transfer removes bacteria embedded with mycelium. If the plate is overrun, sporulating, or ambiguous, discard it through the lab’s contained waste procedure and restart from a better donor. The contamination guide supports triage without encouraging risky reopening.
Preserve identity and performance records
Assign a stable culture identifier and connect every plate, slant, grain jar, and fruiting test to its parent. Record passage count, medium, temperature, dates, contamination, colonization, morphology, yield, and deviations. The grain spawn guide covers a later expansion stage after a verified culture; cloning specifically covers donor-to-agar traceability.
Discard ambiguous plates instead of diagnosing every color by sight. The contamination guide explains observation and isolation boundaries for production materials; a clone remains provisional until clean transfers and a fruiting test support it.
Separate the master from working copies
Once a candidate is acceptably clean under the chosen method, create a low-passage master and derive numbered working cultures rather than repeatedly reopening the master. Record each parent plate, transfer date, medium, operator, storage location, and disposition. The culture-storage guide explains why a lineage map is more useful than a jar labeled only with a species name.
Prove performance with a matched small trial
A clean-looking plate is an intermediate result, not a production result. Inoculate a small, traceable batch alongside a known comparison culture. Match substrate lot, treatment, moisture, inoculum amount, container, incubation position, fruiting conditions, and harvest rule. Predefine rejection and harvest criteria before seeing which culture looks better.
Record colonization recovery, full-colonization date, contamination by unit, pinning date, harvestable mass, rejected mass, morphology, and quality by flush. Calculate yield using the same dry-substrate denominator. Repeat promising results in another batch before promoting the clone to routine production. One fast plate or one large fruit body can be noise from position, environment, or substrate.
When not to clone
Do not clone an unidentified wild mushroom to infer edibility or species. Do not bring decaying or insect-heavy material into a clean culture room simply because it is unusual. Skip donors with no traceable source when commercial identity matters, and do not clone protected or unlawfully collected material. For purchased food mushrooms, the retail species label may support a culinary name but not strain authentication or ownership of proprietary genetics.
If the goal is genetic diversity, spore work answers a different question from tissue cloning and produces segregating offspring rather than a copy of one fruit body. If the goal is a dependable production culture, an authenticated culture collection or reputable supplier may be faster and more defensible than rescuing an uncertain donor.
A release checklist for the candidate culture
Before the candidate leaves quarantine, confirm that its donor record, plate lineage, controls, transfers, storage location, and production trial are connected by IDs. Review images for every plate generation and retain failed branches instead of silently deleting them. State what testing was actually performed; visual inspection is not microbial sequencing or species authentication.
Release only the specific working culture that passed the defined check. A sister branch from the same donor may have a different contamination history. Set a passage or time limit, preserve the master appropriately, and repeat a clean-plate and production check after unexplained drift. This makes cloning a documented selection process rather than a single dramatic transfer.
Frequently asked questions
Prove the clone through a controlled fruiting test
A clean-looking agar culture is an intermediate result. Expand a limited test through the normal verified spawn and substrate workflow while retaining the parent plate or slant. Record colonization speed, sectoring, contamination, initiation, morphology, harvest timing, yield, and deviations. Compare with a known culture under the same conditions when possible. Do not expand an untested clone across the entire production schedule.
Fruit-body phenotype reflects genotype and environment. A clone from a large cluster will not necessarily repeat that size when substrate, temperature, carbon dioxide, light, hydration, or harvest timing changes. Likewise, abnormal fruiting may come from the room rather than the culture. The test establishes performance only for the documented system and gives a point from which later drift can be recognized.
Cloning copies tissue, not certainty?
Tissue cloning starts a culture from a fruit body rather than spores. It can preserve much of the donor genotype, but it does not prove species identity, eliminate latent contamination, or guarantee the same yield under another substrate and climate.
Choose a documented cultivated donor?
Record supplier, strain or lot, species label, harvest date, substrate, flush, fruit-body position, maturity, form, and performance. Choose healthy tissue without insect tunnels, soft decay, or abnormal growth.
Prepare agar and workspace before opening tissue?
Prepare poured, sterile agar plates, sterile tools, labels, waste container, and the clean-air workspace before handling the mushroom. High-nutrient agar readily supports competitors.
Expose clean inner tissue by tearing?
Tear the fruit body open to expose tissue that has not touched the exterior. The stem-cap junction or another firm internal region is often convenient for cultivated fleshy mushrooms.
Transfer a tiny piece without crossing dirty surfaces?
Use a sterile cooled tool to lift a very small internal fragment and place it on agar without contacting gloves, container walls, plate rim, or the donor surface. Open the plate only as much and as long as needed.
References
Source quality notes
MushroomScope cites sources that match the page scope, such as taxonomic databases, extension guidance, food-safety agencies, food-composition databases, and peer-reviewed or institutional health references. Sources support context and uncertainty; they do not turn an online page into specimen identification, medical advice, or a tested recipe record.
Frequently asked questions
Cloning copies tissue, not certainty?
Tissue cloning starts a culture from a fruit body rather than spores. It can preserve much of the donor genotype, but it does not prove species identity, eliminate latent contamination, or guarantee the same yield under another substrate and climate.
Choose a documented cultivated donor?
Record supplier, strain or lot, species label, harvest date, substrate, flush, fruit-body position, maturity, form, and performance. Choose healthy tissue without insect tunnels, soft decay, or abnormal growth.
Prepare agar and workspace before opening tissue?
Prepare poured, sterile agar plates, sterile tools, labels, waste container, and the clean-air workspace before handling the mushroom. High-nutrient agar readily supports competitors.
Expose clean inner tissue by tearing?
Tear the fruit body open to expose tissue that has not touched the exterior. The stem-cap junction or another firm internal region is often convenient for cultivated fleshy mushrooms.
Transfer a tiny piece without crossing dirty surfaces?
Use a sterile cooled tool to lift a very small internal fragment and place it on agar without contacting gloves, container walls, plate rim, or the donor surface. Open the plate only as much and as long as needed.
Related guides
growing
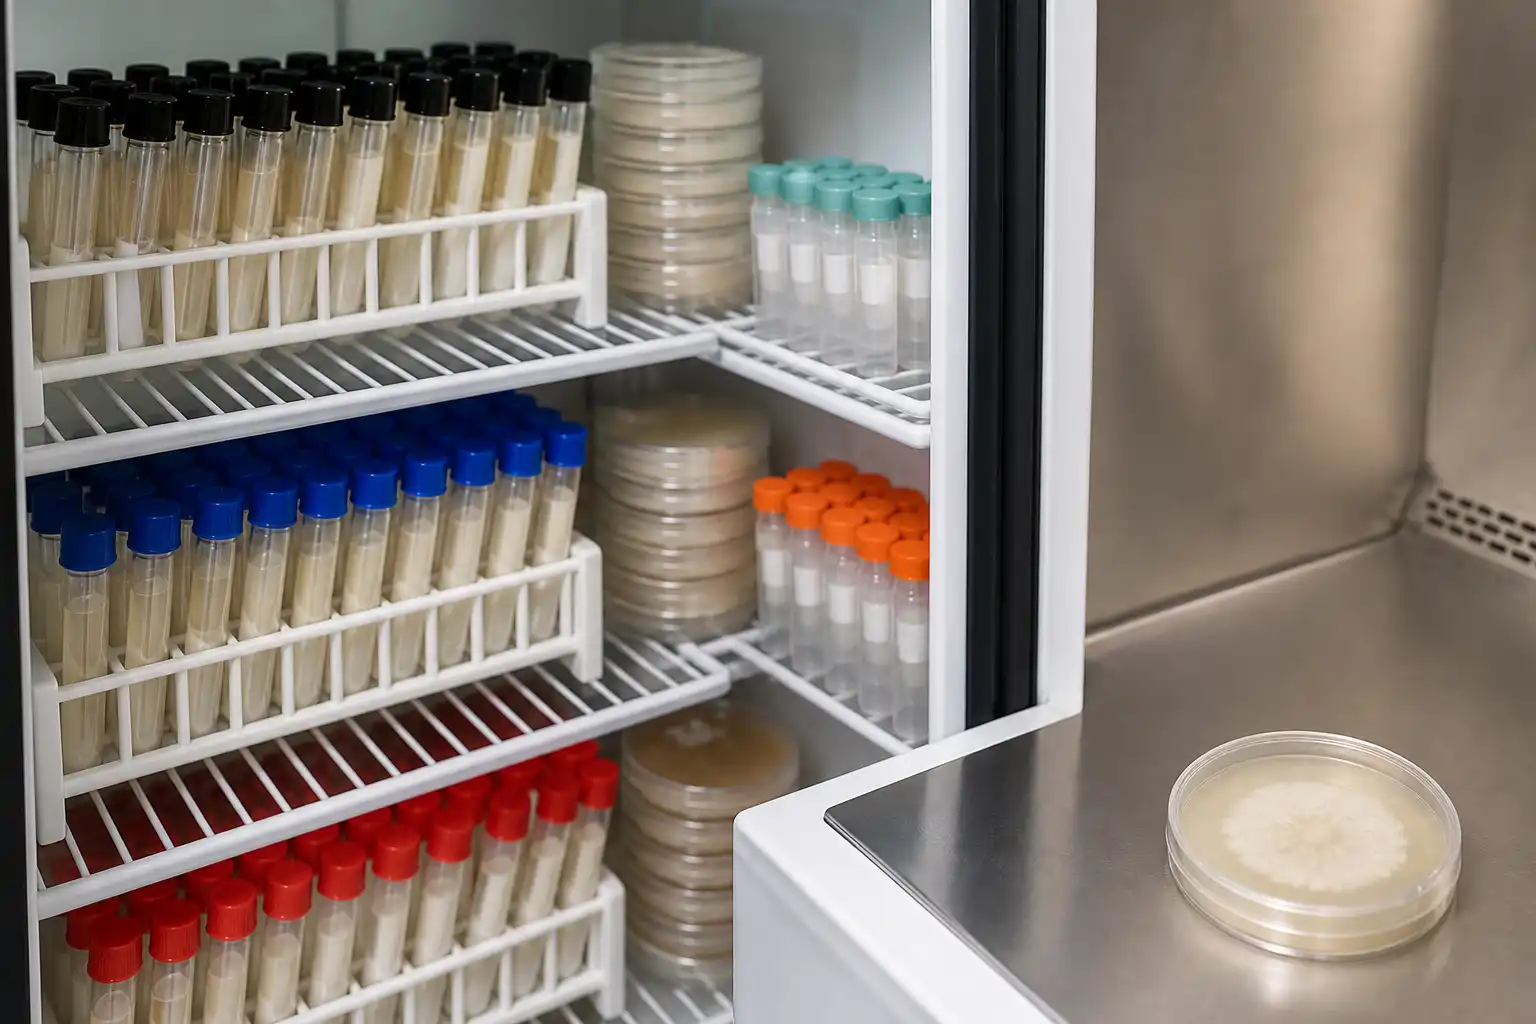
Mushroom Culture Storage: Working Plates, Slants, and Inventory
Store mushroom cultures with a master-and-working system, sealed slants, temperature records, passage limits, recovery tests, and traceable inventory.
growing
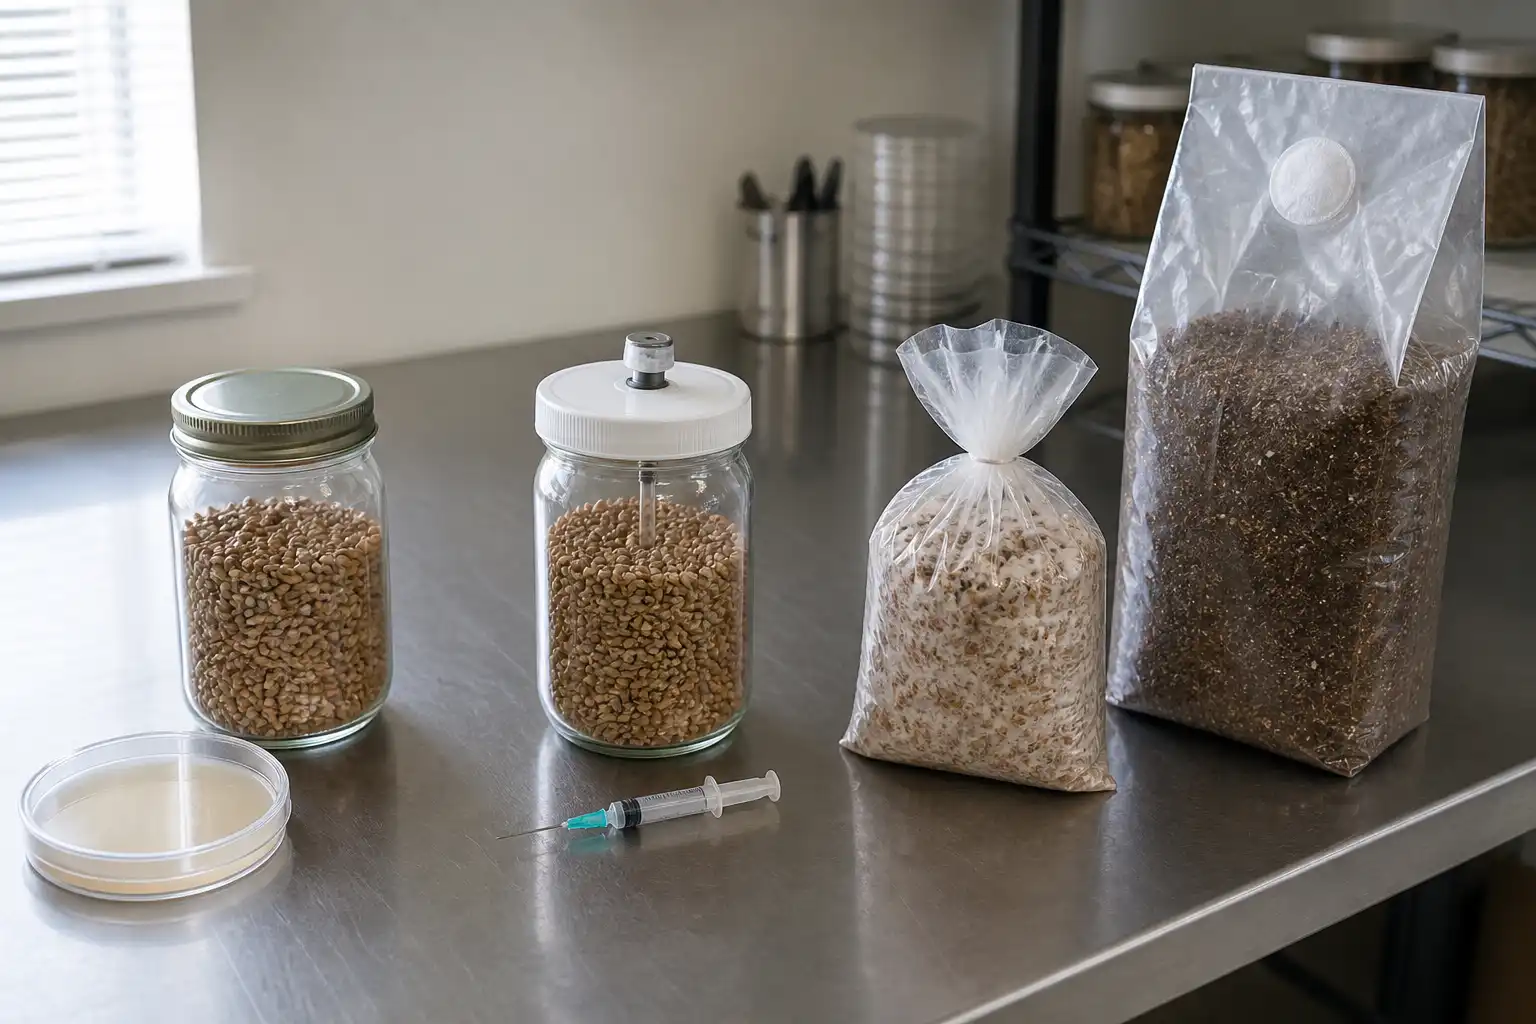
Mushroom Inoculation Methods Compared
Compare agar, liquid culture, grain-to-grain, sawdust spawn, and plug spawn by substrate, scale, cleanliness, and traceability.
growing
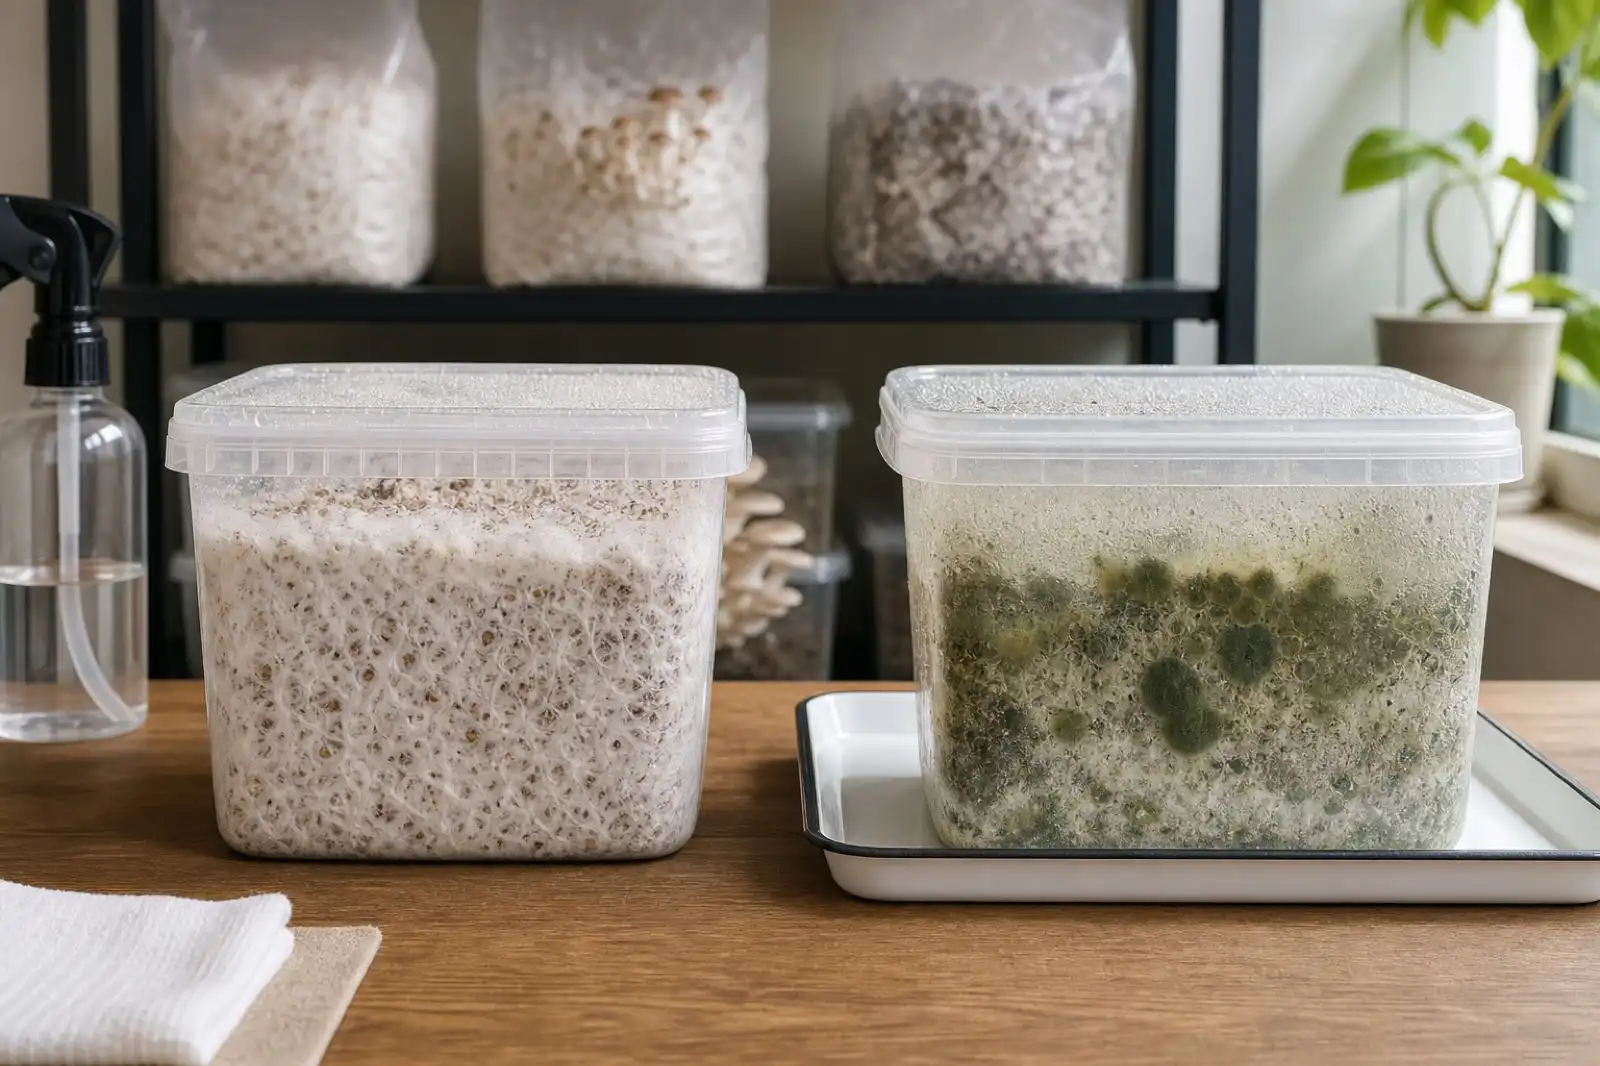
Mushroom Contamination: Isolate, Record, and Prevent Repeat Problems
Recognize mushroom contamination without relying on color alone; isolate suspect batches, avoid food salvage, document the workflow, and prevent repeat issues.
Continue exploring
Browse more practical guides in Growing or visit the mushroom encyclopedia.